
利用 Cloudflare 的 DNS 自动验证功能,申请泛域名证书
References
说明・acmesh-official/acme.sh Wiki
dnsapi · acmesh-official/acme.sh Wiki — dnsapi · acmesh-official/acme.sh Wiki
前置条件
- 有服务器
- 有域名
- 域名设置到 Cloudflare
优点
- 泛域名省事,nginx 通配
- 自动延长证书有效期
设置 DNS
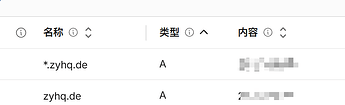
image769×235 8.25 KB
准备 CF_Zone_ID 和 CF_Token
准备 CF_Zone_ID
位置在对应域名的概述窗格下,cloudflare 前端界面可能会改变,图片仅供参考。
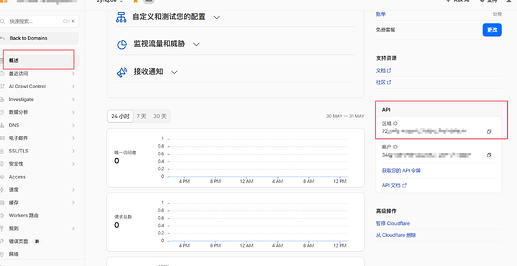
image2451×1262 247 KB
准备 CF_Token
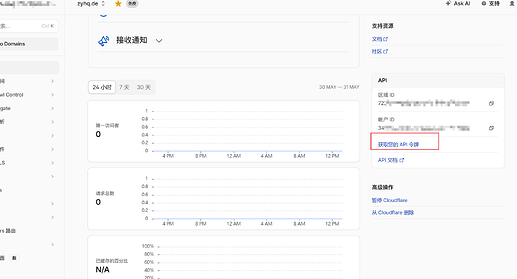
image2323×1255 202 KB
select
Zone -> DNS -> Edit, and under Zone Resources, only choose the domain we need.
大概像这样,确定后保存好 CF_Token
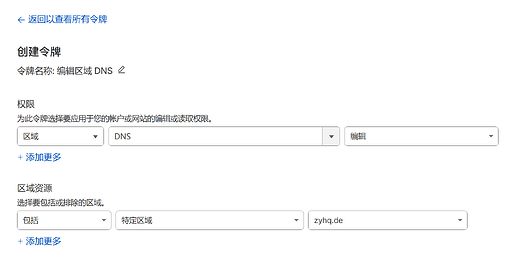
image1636×820 39.9 KB
申请
安装 acme
在服务器上,以 Ubuntu 为例。
1 | sudo apt update |
最后一步能显示,说明安装成功。
安装证书
1 | export CF_Token="**************" |
/etc/nginx/ssl 属主是 root, acme.sh 以用户 zyhq 运行,写不进去,需要把目录属主改成当前用户 zyhq。
1 | # zyhq换成自己的用户名 |
以 nginx 为例,其余参考最上面的 references.
完成。